What you will do in the next half hour
Buy USDT cheaper on one exchange, move it to another and sell it higher. The gap between the two prices is your earnings. No forecasts, no charts, no bets on where the market goes: both trades happen almost simultaneously, and it makes no difference to you whether bitcoin is rising or falling.
About the scale, so expectations stay realistic. A real route is one and a half to three percent. On a thousand dollars that is 15–30 dollars for half an hour. That is honest money and an honest number. Anything promising twenty percent is covered at the end, in the section on mistakes.
The guide uses hryvnia in its examples, but it works exactly the same for the lira, tenge, zloty, real and any of the eighty-nine currencies we collect. You choose the currency yourself: it is not picked by country, and until you choose, it is USD.
What you need before you start
- Accounts on two exchanges. One to buy, one to sell. A working pair to begin with:
 Binance and
 Bybit.
- Verification completed on both. P2P does not work without it anywhere. It takes from ten minutes to a day.
- A bank card you actually use, with enough limit to receive and send.
- A small USDT reserve on the second exchange. Optional, but step 6 explains why it doubles the speed of the whole scheme.
Step 1. Set the radar up for yourself
Open P2P rates. The filter panel at the top decides everything you see below it.

Asset — leave it on USDT. It is the most liquid coin on P2P: the most offers and the tightest price gap.
Currency — yours, chosen by hand: it is not picked by country, it is USD until you choose, and the page remembers your choice.
Amount — the field people skip most often, and wrongly. Enter the amount you actually intend to trade and the scanner keeps only the offers whose limits you fit. Without it, a price from an offer with fifty dollars available lands on the board and you build your whole calculation on a trade you cannot make.
Payment method — pick your bank. The rate shifts noticeably: popular banks have more sellers, more competition and better prices.
Below are the exchange toggles. Keep the ones where you hold accounts.
Step 2. Read the board

Four cards answer four questions: where it is cheapest to buy, where it is dearest to sell, the percentage gap between them, and the premium the market pays for a dollar in crypto against the central bank rate.
But the important part is not the percentages — it is the lines underneath: the offer limits and the route size. A six percent spread on 60 USDT is under four dollars before costs, and not worth two trades and a transfer. A one and a half percent spread on 3000 USDT is forty-five dollars, and that is work.
Step 3. Check your route on the matrix
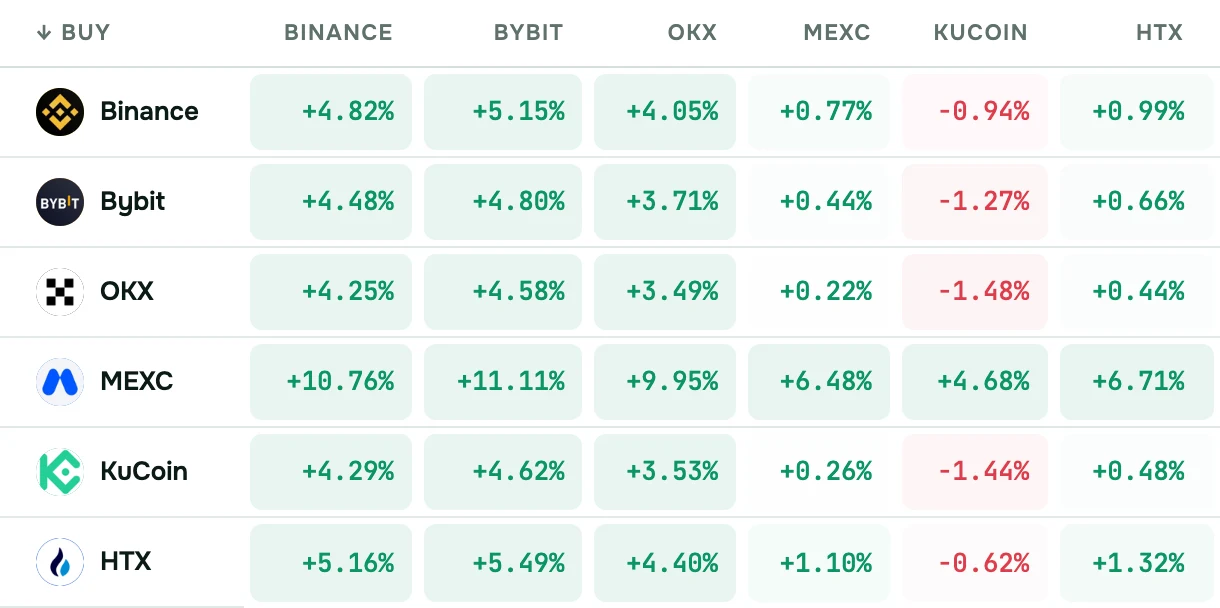
The board shows the best route overall, which is not always yours: the cheap buy may sit on an exchange where you have no account. The matrix solves that. Row is where you buy, column is where you sell, the cell holds the percentage before fees.
Step 4. Work out what is left
This step separates earning from busywork. The percentage on screen is the gap before costs. Four things come out of it:
- The P2P buying fee. Zero for buyers almost everywhere, but check on your venue.
- The transfer fee between exchanges. It depends on the network, not the amount: about 1 USDT on TRON, 0.01 on BSC, and on
 HTX via BTT just 0.001.
- The selling fee on the second exchange.
- Price movement during the minutes the transfer takes.
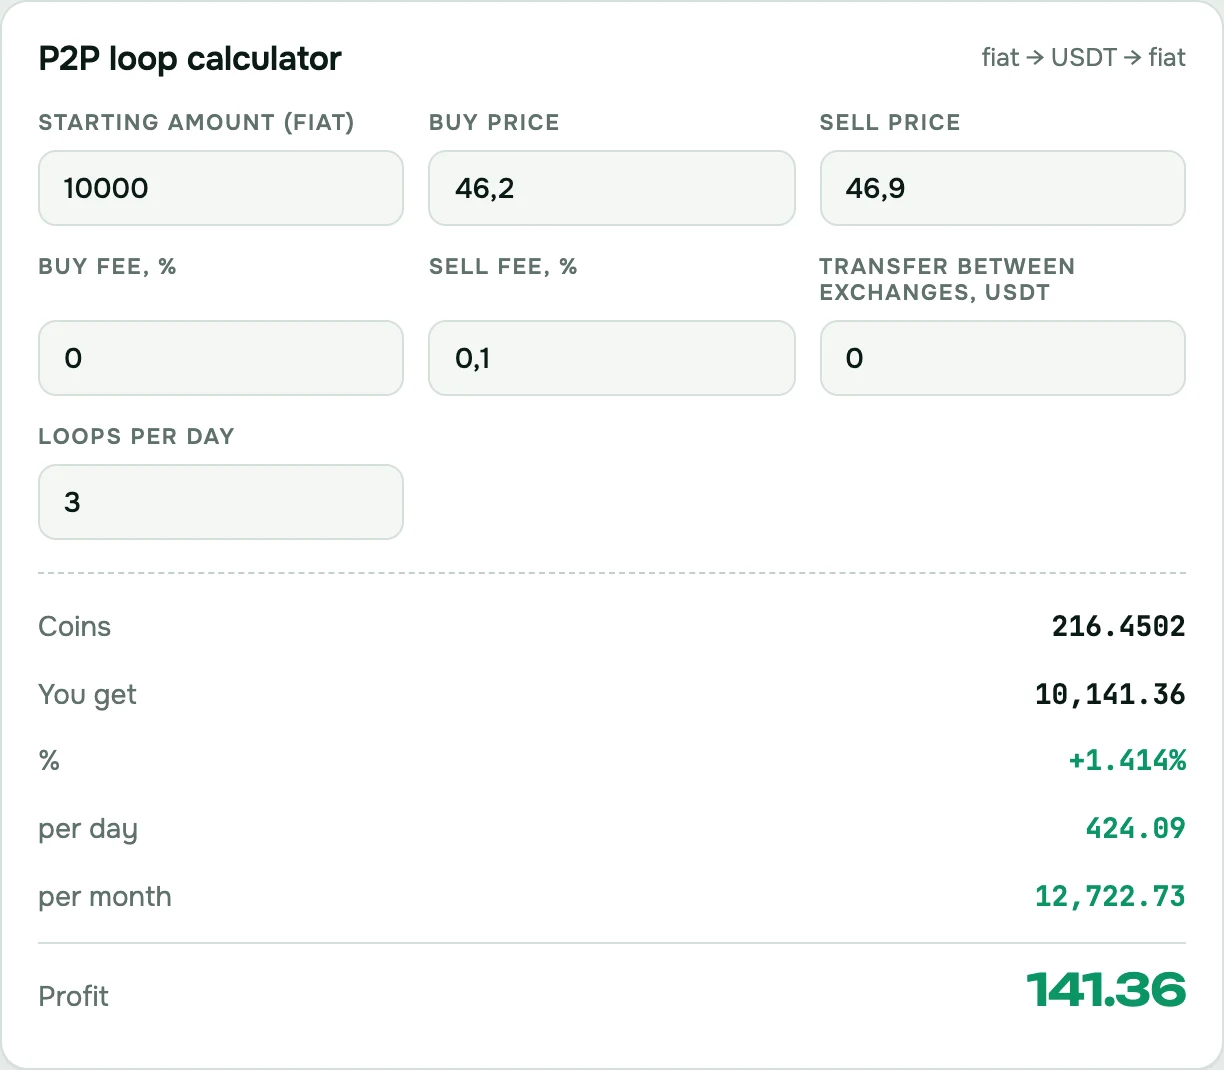
A live example. Take 20 000 hryvnia, buy at 45.80 — you get 436.7 USDT. Transfer on BSC for 0.01 — 436.69 left. Sell at 46.90 — 20 480 hryvnia back. Earnings 480 hryvnia, or 2.4% on the operation.
The same trade at a 0.5% spread: 20 000 → 436.7 USDT → sold at 46.03 → 20 100 hryvnia. A hundred hryvnia for two trades, a transfer and half an hour. This is why we keep pressing about size: a percentage without an amount means nothing.
To avoid doing the arithmetic in your head there is a calculator.
Step 5. Buying USDT on the first exchange
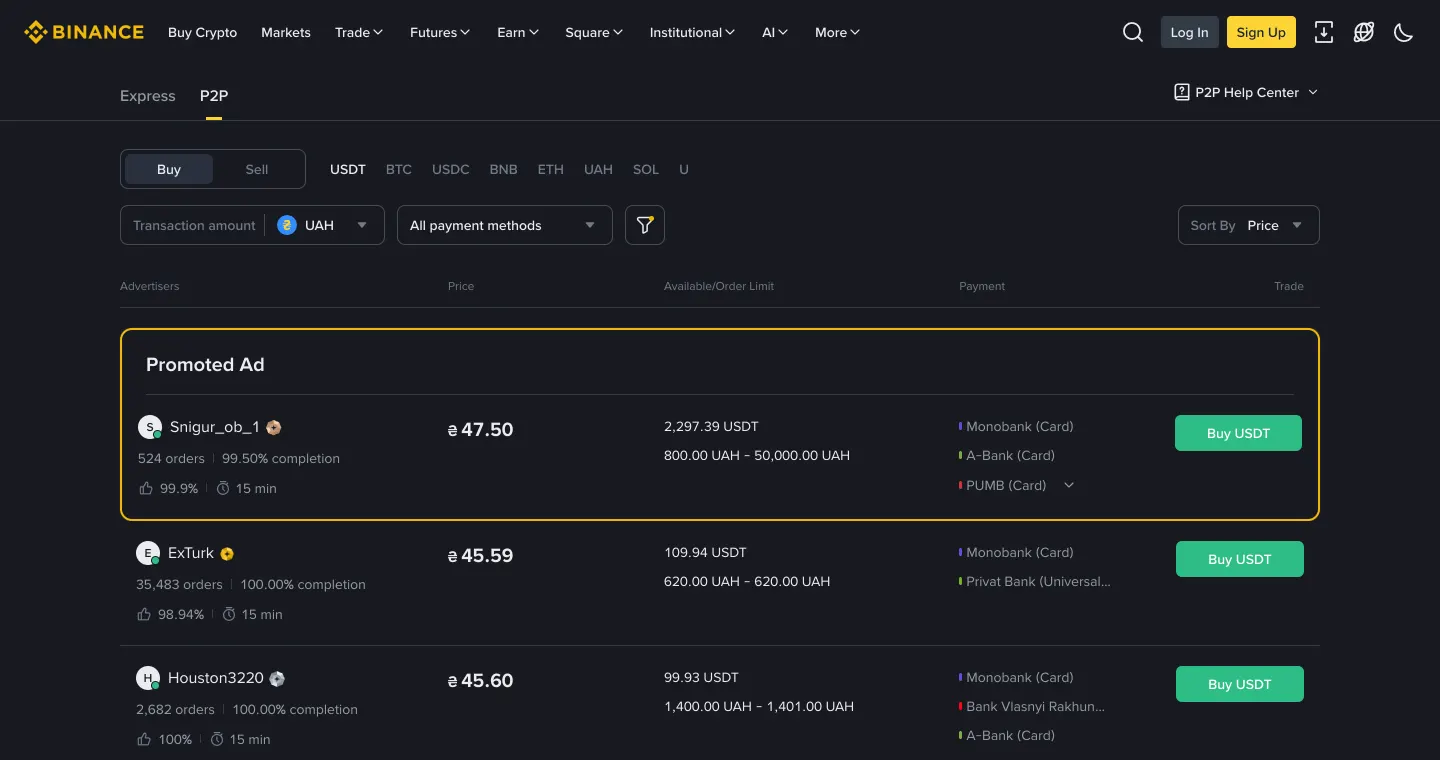
- Make sure you are in the P2P section on the Buy tab.
- Check the price. If it differs from what the radar showed, the offer has already changed. Go back and take the next one — do not chase it.
- Look at the merchant: trade count and completion rate. Several thousand trades and a rate near 100 is fine. A dozen trades and 85% — find another.
- Enter the amount in your currency, not in USDT: that way you land inside the limits for certain.
- Press Buy USDT. The exchange locks the seller coins in escrow and a timer starts, usually 15 minutes.
- The seller payment details open. Send exactly the stated amount from an account in your own name. Paying from someone else card is the most common reason a trade gets frozen.
- Do not write crypto, USDT, bitcoin or exchange in the payment reference. Banks react to it. Leave it empty.
- Go back and press I have paid. Never press it before the money has actually left.
- Wait for the seller to release the coins. If they stall, open a dispute with Appeal — support will look at the receipt.
Step 6. Moving the coin to the second exchange
- On the second exchange open Deposit → choose USDT.
- Choose the network and remember it.
- Copy the wallet address with the copy button, never by hand.
- Go to the first exchange, open Withdraw → USDT.
- Paste the address and select exactly the same network.
- Check the fee — the exchange shows it before you confirm.
- Confirm with the code from your email or app.
The main rule: the sending network and the receiving network must match. Send USDT on TRON to a BSC address and the coins go nowhere.
The second rule: some coins and networks use a MEMO or tag. If the exchange showed one next to the address, it is mandatory.
How long it takes: on BSC and TRON usually one to three minutes. Each exchange's USDT networks and withdrawal fees are on its page under Exchanges.
And now the trick the USDT reserve is for. Prices move while the transfer is in flight. If coins are already sitting on the second exchange, you sell them immediately without waiting, and the incoming transfer simply restores the reserve. The route closes in minutes instead of half an hour.
Step 7. Selling on the second exchange
- Open P2P → the Sell tab → USDT.
- Check the price is still the one you came for. If it has gone, do not sell at a loss on principle — USDT is a dollar, it will keep.
- Pick a buyer offer with suitable limits and your bank.
- Enter the USDT amount and press Sell. Your coins go into escrow.
- Give your receiving details — a card in your own name.
- Wait for payment and check it in your banking app, not in the trade chat.
- Only once the money has genuinely arrived, press Release coins.
Point 6 is the most important in the whole guide. A payment screenshot, a chat message, even an SMS from a bank prove nothing.
Step 8. Count the result
Write down four numbers: what you spent, how much USDT you got, what you sold it for, what went on fees. Keep that table from the very first trade — after ten operations you will see your real return instead of the expected one.
Common mistakes and what they cost
- Chasing a big percentage. A 10–15% spread almost always means a fifty-dollar offer, an exotic payment method or a fraudster.
- Not checking limits. You see the price, start the trade, and the maximum is 2000.
- Getting the network wrong. The most expensive mistake there is. Check twice.
- Releasing coins on a screenshot. The classic scam. Bank statement only.
- Paying from someone else card. The trade gets frozen.
- Writing USDT in the payment reference. A direct route to questions from your bank.
- Counting percentage without size. Six percent of sixty dollars is three dollars.
Frequently asked
How much money do I need to start? You can work from a couple of hundred dollars, but the transfer fee does not scale with the amount. A sensible start is 300–500 dollars.
Is it legal? Buying and selling crypto between people is legal in most countries. Tax questions depend on your jurisdiction — ask a local specialist.
Why might my bank ask questions? Banks dislike frequent identical transfers from different individuals.
Why did the route vanish while I was opening it? P2P prices live for minutes. That is exactly why we suggest keeping a reserve on the second exchange.
P2P scam patterns are covered separately in the guide to fraud.